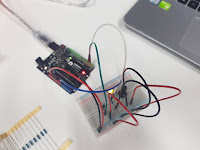
First Arduino Experiment
In our first Tech workshop, we were officially introduced to Arduino.
- What? Open source electronics
- Why? User interaction to test interactions and receive feedback
- Allows hands on interaction and be able to give an electric engineer for e.g. an idea down the track
- About taking more steps to build your product
- Can do temperature example, take in one input like temperature
- Project examples on Arduino website like colour detection
- Another e.g. window painting robot
- There’s no limit to what you can do with Arduino
- Exercise encouragement via automated BB gun
- Can use it for a lot of medical solutions, e.g. fall detection
- Carls’ project – Rowing Glove, worked with injury prevention and rehabilitation during rowing with mobility tracking
- James project – CPR Training device – guides users through CPR using basic inputs and outputs

- Power and ground pins (3.3V, 5V GND GND Vin)
- Important to know which volts your project runs on, majority is 5V
- Eception3.3V
- Recommend not power by that method unless you know
- Analog Pins (A0, A1, A2, A3, A4, A5)
- Temperature, for example, add the analog inputs
- Digital Input and Output Pins (13, 12, 11, 10, 9,8, 7, 6, 5, 4, 3, 2) Digital inputs, the buttons and switches
- 0 and 1 are difference TX RX
- - Squiggly line is PWM Pulse Width Modulation, Pseudo-Analog inputs (11, 10, 9, 6, 5, 3)
- Breadboards – is used for prototyping its like a connector board, with connector channels to connect components and wires. A and D are for running power, B and C are for connecting components
- Can use the breadboards to power your powerline and, how you would wire a LC board
- Different components can give off interference, and you may have it on a different circuit so they don’t influence each other
- Inputs is what your Arduino reads, user interacts with inputs, outputs user responds with
- If then statements
- Checks a variable for certain requirements, performs a task based on the result
- If the button is pressed – turn LED light
- If it is dark outside – turn the outside lights on
- Flowcharts – when running code always needs option, if you’re doing if statements than you need an else
- Always easy to write code that has been flowcharted first
Exercise Activity
- Blink exercise
- Void setup – setup once, its for the info to loop again etc
- Void loop – is the main loop that is doing everything
- Google different ways to debounce buttons
- Fading light example
The Fading Light Example (Video)


Comments
Post a Comment